HWK F3: 3D printing - Printing a fluffle
I was today-years-old when I learned that a herd of bunnies is called a fluffle. And yes, we will be 3D printing an entire herd, or fluffle.
It’s printing time!
We continue working on our fluffle (a herd of rabbits) using the design I described in the last blogpost. I decided to use the FDM (Fused Deposition Modeling) printer available at Tufts NOLOP facility to print out the herd. The reasoning behind this decision was the availability of the printers. NOLOP only has one SLA printer (Stereolithography), and students can only operate it under supervision.
I have used 3D printers quite a lot recently since I took a 3D Bioprinting class offered by the Biomedical Engineering Department, and I am also working on a 3D printing enhancement project at a biomedical lab. However, most of my prints were basic shapes or large sized objects that do not require high print quality.
Since I want to give these bunnies to my friends (for Friendlentine!), the bunnies have to at least look healthy and lively.
Challenge: The printed object must have detail resolution at 1mm or less. Minimal amount of support is necessary and overhanging parts (arms, ears) have to resist breakage.
0. What Can Be 3D Printed?
Traditional manufacturing processes like molding have been industry standard for a long time. However, it is a very inefficient process to use for prototyping virtually anything. Every new change in design means a change in the mold for every new prototype version.
Complex objects with futuristic or organic patterns (i.e. corral patterns) are expensive and very difficult to be manufactured using traditional methods as well.
1. Slicer Software and Slicing
I used PrusaSlicer to slice the designs since the printers at NOLOP are all Prusa printers. First, I loaded the designs into a slicing workspace. For the first print, I chose to print only 3 bunnies (a small friend group).
For some reason, the loaded bunny was huge (like huge, huge!), so I scaled it down to 25% (about 4.5cm or 2 inches in height). Then I copy-pasted the bunny twice and used “arrange” tool to rearrange bunnies in the most optimal way for printing (the less time the printer spends on moving, the faster it will be done).
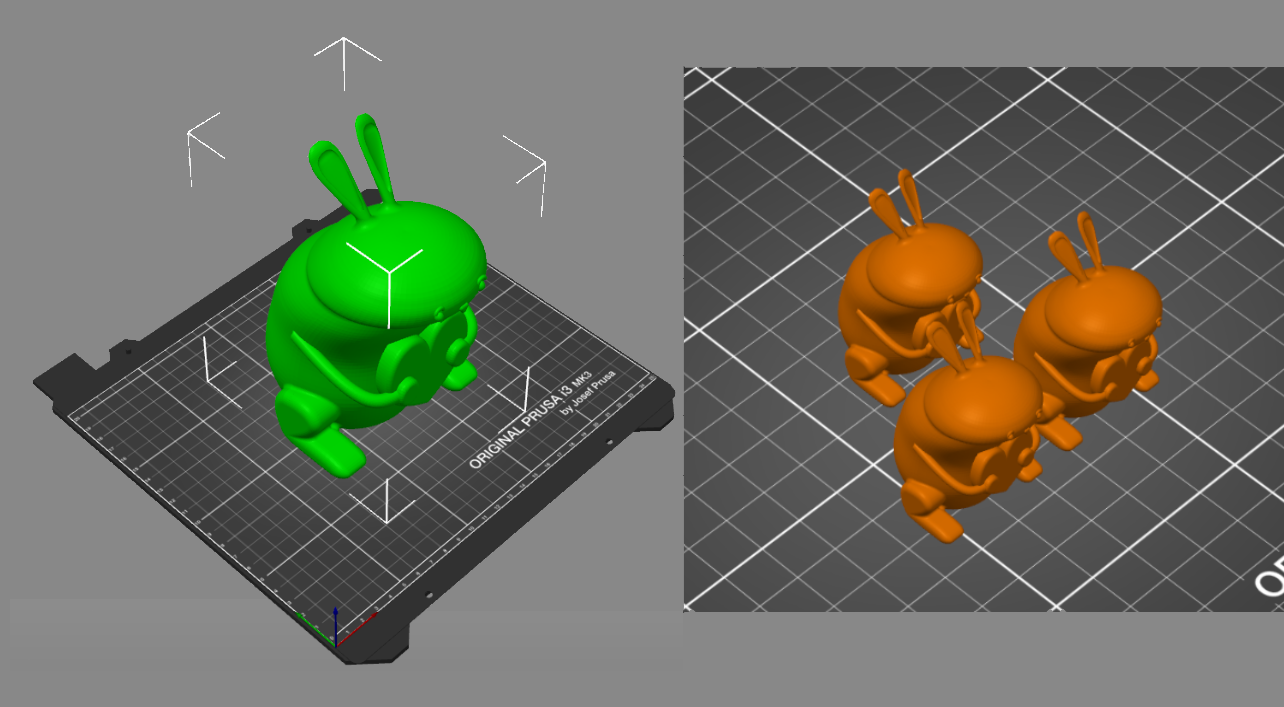
I faced a challenge on deciding how to print the bunnies. Intuitively, I wanted to print them as they stand normally, but I wasn’t sure if that would be the best printing position since I have to take supports generation and object’s surface quality into account. I realized the first option, which is printing the bunnies as they stand vertically, would be the best since there won’t be any supports attached to the ears - the most fragile part of the bunny. Also having supports going from the printing plate to the object instead of between object and object (ie bunny’s chest and the heart) would be much easier to remove.
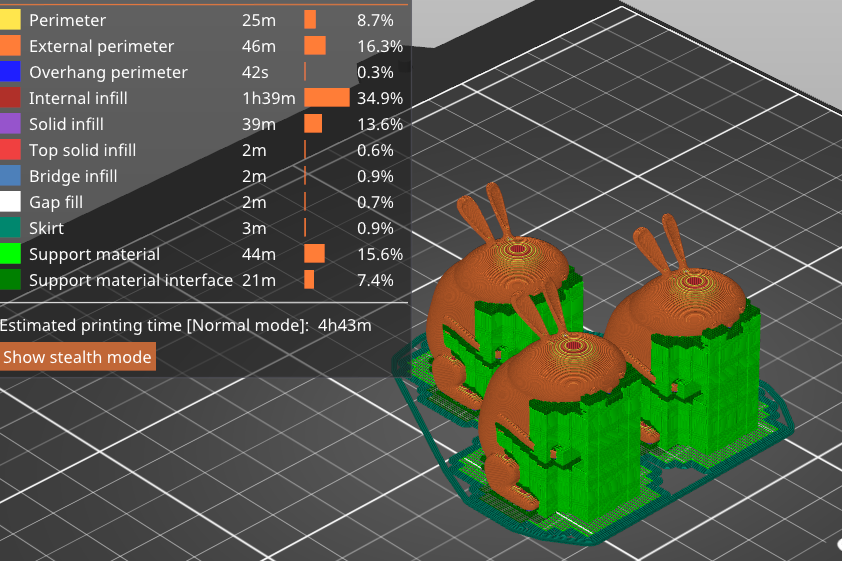
I tinkered with different printing settings: added brims and raft layers, mainly so I could analyze printing quality so that I could adjust on the go, and also to make it easier to detach the bunnies from the printing bed.
I turned the support generation feature on and selected the overhang threshold to be 0, which means the slicer will generate supports adaptively.
Then, I selected infill density to be 30% and fill pattern “gyroid”. Usually I print at 10% infill to save time and material, but since the bunny is relatively small with many small details, I wanted to ensure the body is strong enough to resist wear and tear. Finally, I sliced the bunnies again and exported Gcode to load into printer.
2. Printing and Adjusting
I followed the instructions at NOLOP on how to print. I simply had to preheat the printer, load my file onto the webapp p2.nolop.org (since I chose a printer with ID p2), and select print.
But, the printing didn’t start. On the control panel of the printer, it showed an error message saying that the gcode was sliced for another printer. I double checked in the PrusaSlicer and apparently my design were sliced for the Prusa MK3 printer, while the printer at NOLOP was a Prusa MK3+ printer.
Lesson: remember to select the right printer (in my case it was Prusa MK3+) when slicing.
I resliced and exported the gcode with the right selection of printer. Load the gcode via p2’s control website and selected “print.”
And the printing began.
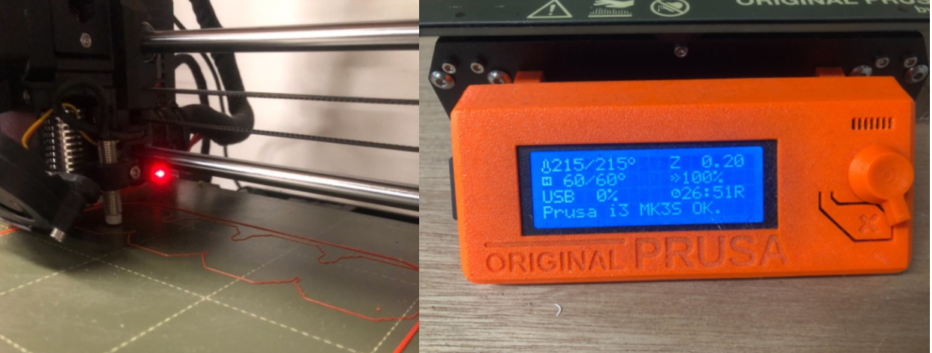
I observed that the first layer had very thick and slightly transparent print lines. It seemed odd to me so I attempted to adjust the nostril’s vertical position (z-offset). I pressed the control button and selected “live adjust z-level.” As I increased z-level, the printed lines got rounder and featured solid color. All set, I observed the printer as it printed to make sure no other issues would occur and left.
Lesson: observe the printer printing a few first layers to adjust the z-offset of the printing nostril while it is printing since different printers are calibrated differently.
3. Removing Supports and Learning
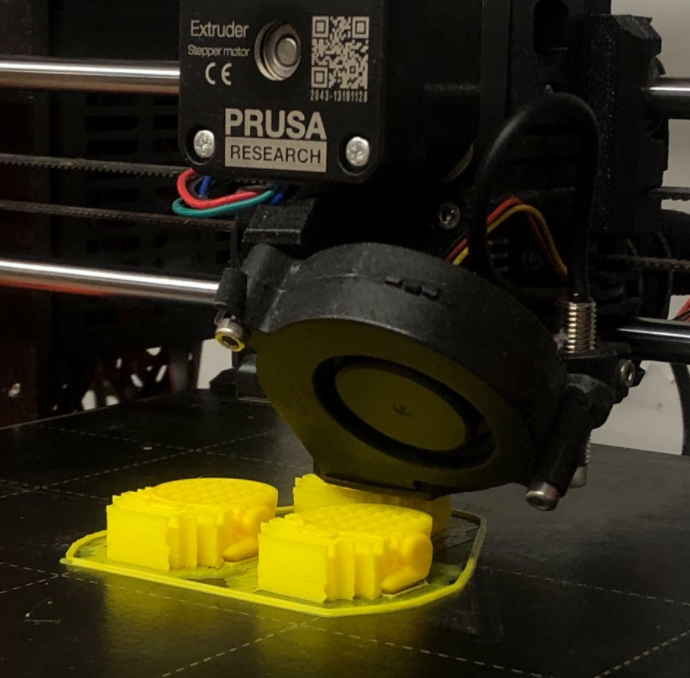
The prints were completed and someone at NOLOP detached them from the printing bed by the time I came back. Then I had to carefully remove the supports without breaking the bunny's arms and ears.
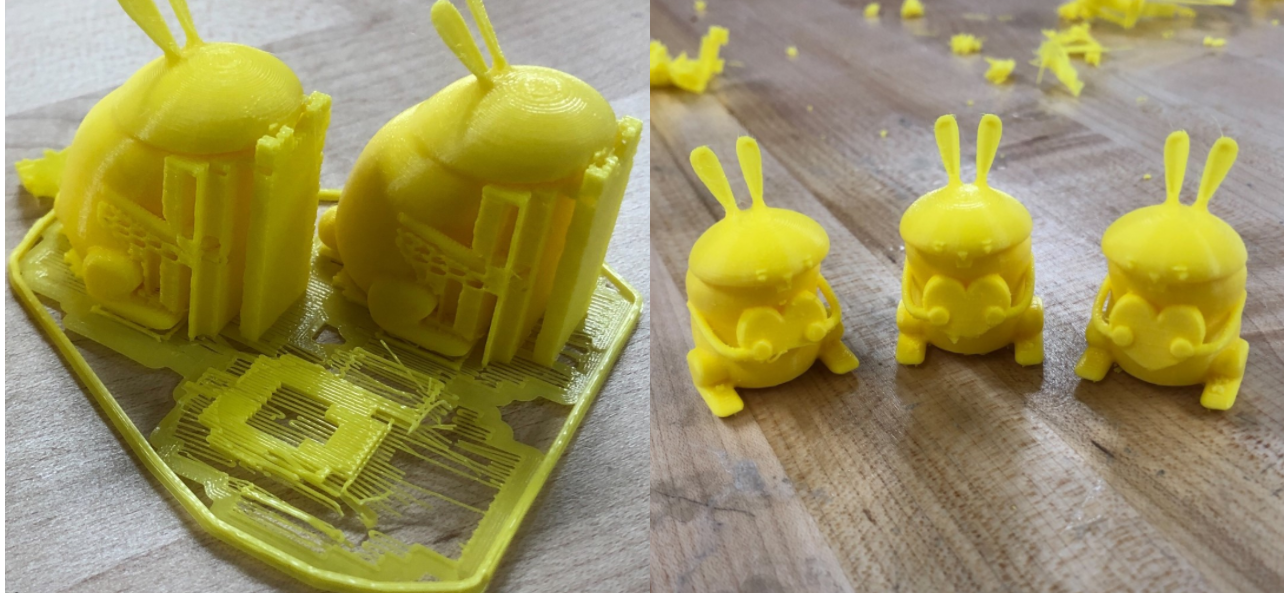
One issue I observed was the hearts that the bunnies were holding. 2/3 bunnies had broken hearts (so sad!). I suspected that the adhesion between supports below the hearts and the bottom of the heart was poor, so somehow a piece of the heart fell off during the printing process.
Lesson: decrease distance between support and print object for higher adhesion and quality of interacting layers.
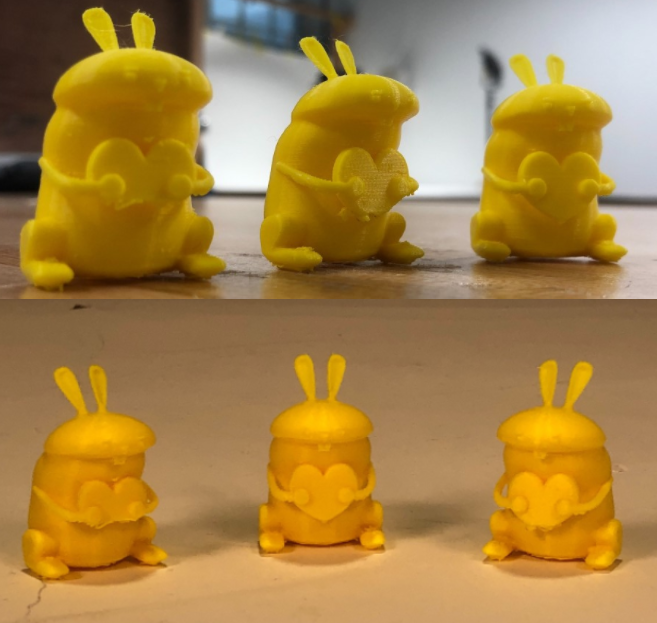
The prototype print went surprisingly well but not without issues and challenges. Now, I will print 12 bunnies with all the corrections and adjustments that I learned from this print. I can’t wait to have an entire herd of bunnies to give to my friends.
Even though I had experience with using 3D printers, there were still challenges to overcome and lessons to learn. I look forward to using an SLA printer to print bunnies with much higher resolution and less support!
Stay tuned for my next project: laser cutting a national heritage.
Artem
